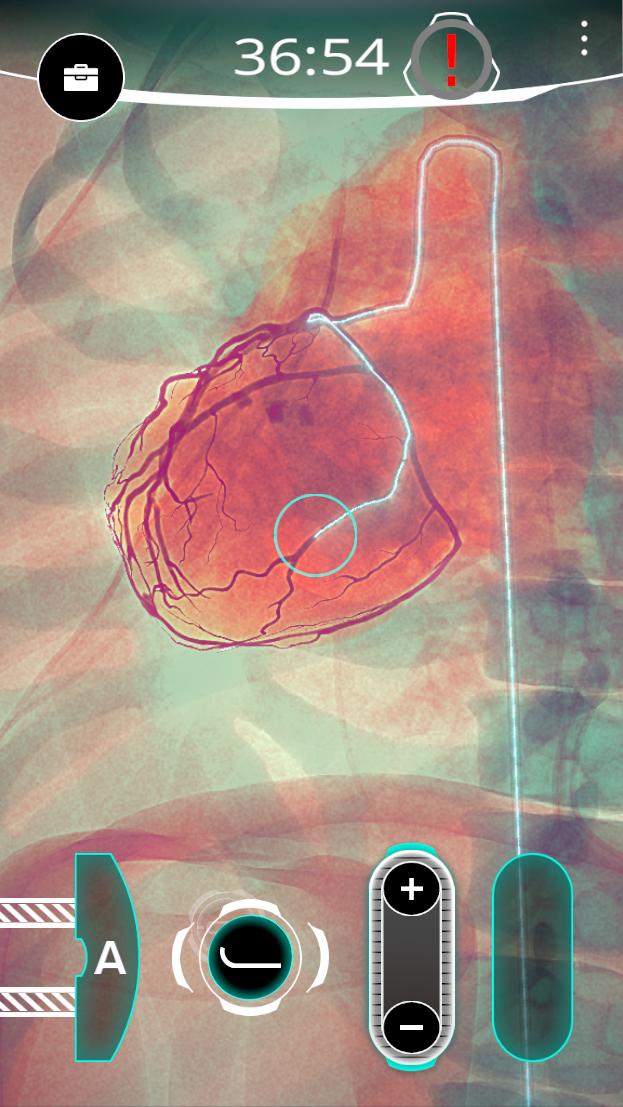
Now that you're all back from GDC: We launched the interventional cardiology game that I've spent the last year on at work
Gonna make a thread for cool tech art/vfx/rendering stuff
Thew
@AmazingThew

https://www.youtube.com/watch?v=fCrkVQEjCv0
- YouTube
Thew
@AmazingThew
First up: The X-ray images in the game are an actually physically-correct simulation.
Here's the earliest gif I've got from working on it, done while we were testing out Unreal 4 (the math was wrong but the gag is good)
Thew
@AmazingThew
Ultimately the X-ray sim is pretty much as described in this paper, plus a bunch of extra post-processing to simulate how the machines subsequently interpret the raw data from the detector:
https://hal.inria.fr/hal-01266065/file/Vidal2016ComputMedImagingGraph.pdf
Thew
@AmazingThew
The L-buffer technique from the paper is INCREDIBLY useful; basically for any watertight mesh you can render out a map of ray-penetration depths, so that every pixel tells you how much material the eye ray passes through
Thew
@AmazingThew
once you've got penetration depths, calculating the energy attenuation for a uniform material is a basic exponential function, with all the parameters from scientifically-derived data:
https://physics.nist.gov/PhysRefData/XrayMassCoef/tab4.html
NIST: X-Ray Mass Attenuation Coefficients - Table 4
Thew
@AmazingThew
Pack those tables into lookup textures and you can pick any input wavelength and render out a texture encoding the voltage striking a detector after your X-rays have passed through the mesh
Tone-map voltages down to LDR with your favorite curves, high-pass filter, and behold:
Thew
@AmazingThew
It assumes uniform DENSITY, meaning if you want your mesh to be a hollow shell, like a skull, it needs interior faces. If it's watertight with no interior geo, that's still valid, it's just a skull made from five inches of solid bone lol
Model like it's a 3D printer, basically

Deleted Tweet
Thew
@AmazingThew
(this also means that density GRADIENTS aren't really possible without volumetric data. For complex structures like the transition from dense cortical bone sheath to lightweight porous marrow, you either need poly counts in the billions, or some kind of cool hacks)
Thew
@AmazingThew
So after some early prototyping we switched to Unity, I got all the X-ray math worked out, @artofblake made a quick heart model, and I started working on a procedural heartbeat vertex shader
Incredibly realistic
Thew
@AmazingThew
@artofblake It kept getting more realistic
Thew
@AmazingThew
So real
Thew
@AmazingThew
Unprecedented levels of realism
Thew
@AmazingThew
𝐲𝐞𝐬
Thew
@AmazingThew
Basically all of these are in some way related to the X-ray sim's behavior. It needs watertight meshes, so that a ray through any pixel is guaranteed to transect a matching number of front-faces and back-faces
If that gets violated it does Interesting Things
Thew
@AmazingThew
Passing through an unmatched face results in potentially VERY large positive or negative numbers being written as depth, which then gets exponentiated when calculating attenuation. These then get passed along to the high-pass filter, which causes even more weirdness
Thew
@AmazingThew
if you've got a bunch of regular pixels and then one of them is Negative One Billion, a high-pass filter will surround it with ringing artifacts, which in this case is essentially a border of pixels set to Positive 500 Million-ish, with the kernel size being the border width
Thew
@AmazingThew
So anywhere the geometry becomes non-manifold, you get chunks of solid black pixels surrounded by white, or white surrounded by black, with lots of cool small gradients in certain depth ranges
That last image was the result of displacing all the tris outwards along their normals
Thew
@AmazingThew
Another fun consequence of the X-ray sim: moving vertices around inherently affects the density calculations (verts further apart = more material to attenuate rays), which allows lots of room for weird VFX stuff
This particular effect didn't end up in the game but the gif's cool
Thew
@AmazingThew
Once we had a fairly solid simulation-y framework in place, we started shifting both the game design and the art direction away from "simulation" and towards flashier, more abstract "videogame"
(this is a sort of weird balance we've been working on navigating with all our games)
Thew
@AmazingThew
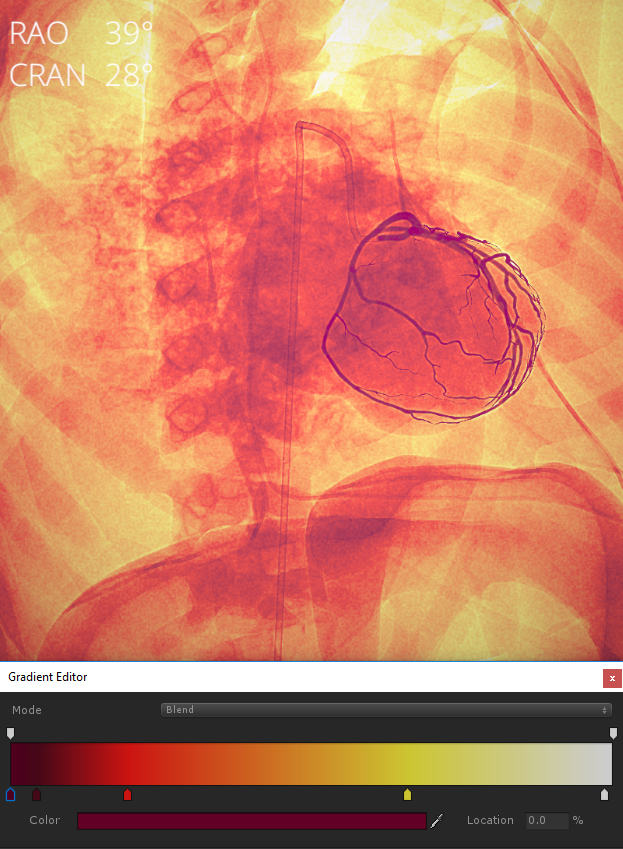
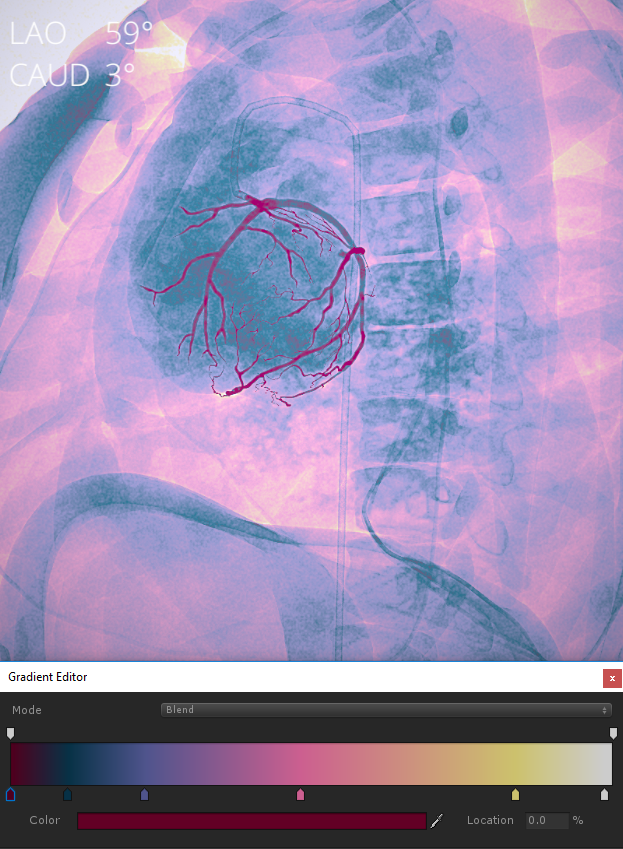
First step towards that end: COLOR
Initial basis was literally just Photoshop's Gradient Map reimplemented in shaders. Make a gradient with the inspector, generate texture from gradient, use greyscale (LDR) x-ray value as lookup into gradient texture
Thew
@AmazingThew
Single fullscreen gradients are a bit monotonous, so the next step was to support MULTIPLE gradients, and use the material depths from the L-buffers as masks to blend between them in interesting ways
Depth values are HDR, so there's a ton of room to play around with mask params
Thew
@AmazingThew
Back on this thread...
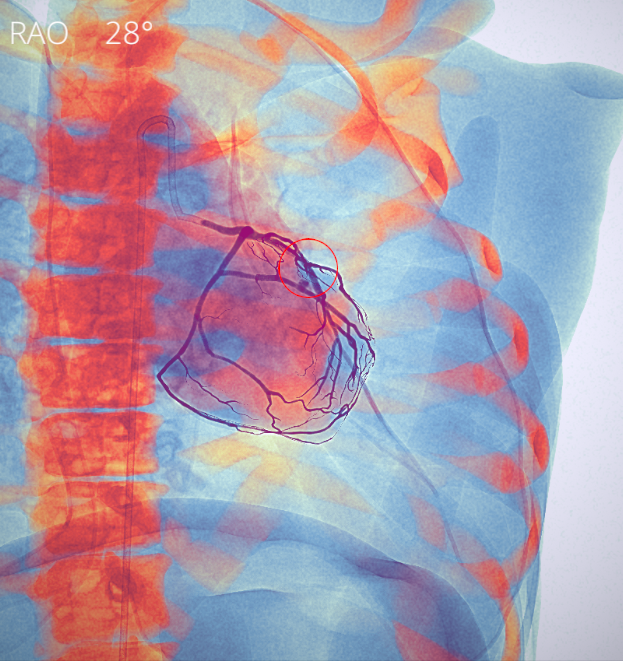
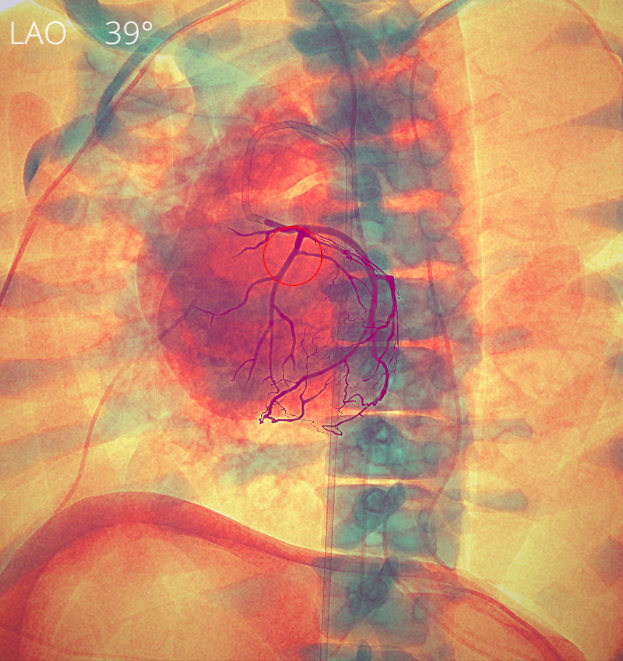
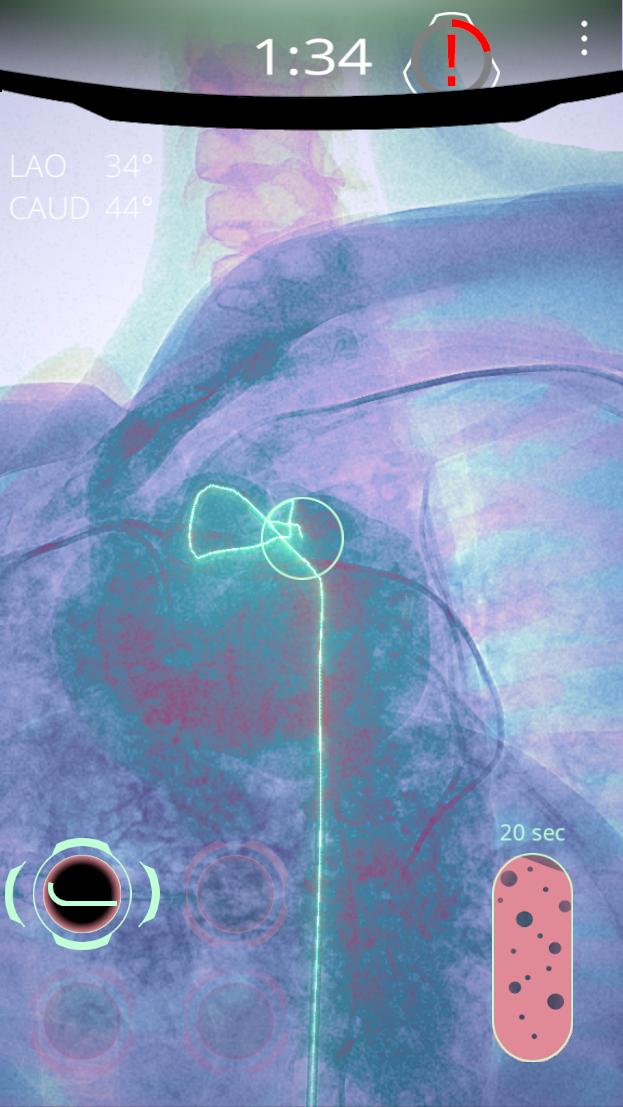
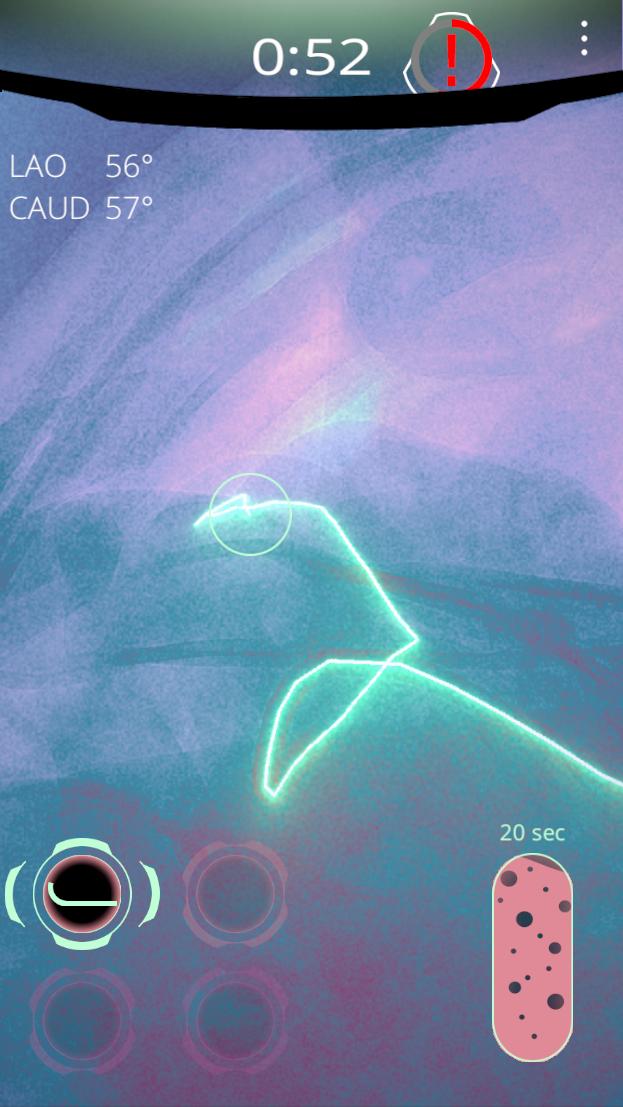
So once we had the ability to play with colors we started to home in on an actual Art Style, mostly consisting of a wide array of color palettes, with the player's tools (usually some variation of wires/catheters) glowing brightly
some early shots:
Thew
@AmazingThew
The glow was a surprisingly interesting challenge, because what the art team wanted wasn't "bloom" so much as an effect similar to Photoshop's Outer Glow layer style: Tightly fitted to the underlying shape but with a potentially VERY large falloff radius
Thew
@AmazingThew
The bloom effect in Unity's post-process stack is great for film-like diffuse glows around highlights, but we found it nearly impossible to tune enough to achieve the "burst gradient" type of effect we wanted, particularly under disparate color palettes
Thew
@AmazingThew
I ended up throwing out the whole post-process stack (most effects are fundamentally incompatible with x-ray rendering anyway) and writing my own glow
Sticks tight to the edges, grows dramatically as intensity increases:
Thew
@AmazingThew
Given the "photoshop outer glow" visual target, the most obvious approach would be SDFs
Did some experimentation with this but ultimately ruled it out. Constructing everything out of functions would suck for workflow reasons (want arbitrary meshes or textured particles to glow)
Thew
@AmazingThew
A related approach would be to render anything glowy to a buffer and then do a screenspace distance transform using jump flooding:
this was potentially usable but also ended up having too many weird problems
https://www.shadertoy.com/view/4syGWK
Thew
@AmazingThew
It isn't a perfect distance transform and has weird artifacts in many cases. Also, while it would support arbitrary textures you can still only have 1-bit alpha since a distance field implies a hard boundary. Also, you need a separate distance field for every distinct glow color
Thew
@AmazingThew
So it happened that a more "traditional" bloom effect was still preferable. Been looking for an excuse to try out @mercury_labs 's mip-stacking trick for ages, so tried that:
https://imgur.com/a/MZD3l
Thew
@AmazingThew
Basically you sum up every mip of your bloom texture, weighting subsequent levels by some aesthetically-chosen curve
the advantage here is it isn't a fixed-radius blur; higher pixel values will contribute more visibly to higher mip levels, and thus can bloom out the whole screen
Thew
@AmazingThew
Not explained in that link: it doesn't work with regular box-average mips; you need each mip to be an actual blur with a decent-sized kernel. Generating a blurred mip chain that doesn't have weird texel alignment issues is... finicky
Thew
@AmazingThew
if you get it wrong you get some cool weird directional tendencies in your bloom though
(note how its glowing sort of... diagonally downward, instead of uniformly)
Thew
@AmazingThew
also generating custom mip chains from Unity RenderTextures is non-obvious and kind of a pain. I released a utility for it a while back (won't solve the above directional problems; that's up to your sampling shader):

GitHub
GitHub - AmazingThew/Unity-Mip-Generator: Generate custom mips for Unity RenderTextures
Thew
@AmazingThew
so after solving all the mip issues and tuning the weight curve adding just absolute *truckloads* of blue noise to modulate basically every conceivable parameter (graphics not good enough? ADD MORE BLUE NOISE):
glow sticks close to shapes and expands outwards at high intensities